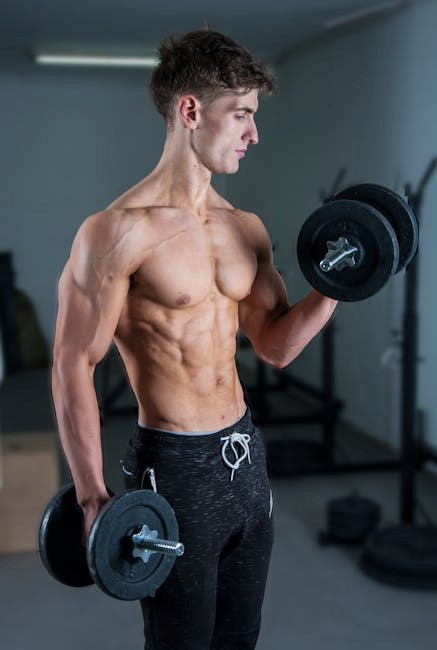
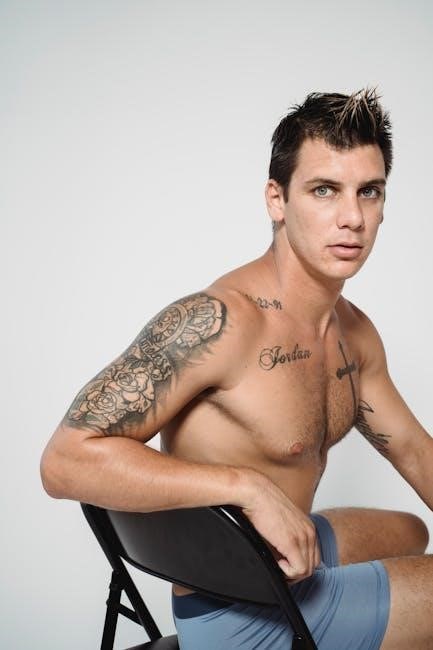
Mens Underwear Size Guide
Navigating men’s underwear sizing can be tricky! This comprehensive guide, sourced from brands like MODUS VIVENDI and retailers such as beztabaka.by,
will help you find the perfect fit. Understanding size charts is crucial for comfort and support.
Understanding Waist Measurement
Accurate waist measurement is the cornerstone of finding the right underwear size. Don’t rely on your pant size, as it can vary significantly between brands and styles. Instead, use a flexible measuring tape to determine your natural waistline.
Here’s how to measure correctly: Stand relaxed and breathe normally. Position the measuring tape around your natural waist – typically, this is the narrowest part of your torso, above your belly button. Ensure the tape is snug but not too tight, and lies level all the way around. Record the measurement in inches or centimeters.
Important Considerations: If your measurement falls between sizes, it’s generally recommended to size up for optimal comfort. Remember that underwear sizes aren’t standardized; a size 32 waist in one brand might differ slightly from another. Referencing specific brand size charts (like those from MODUS VIVENDI) is essential for a precise fit.
Don’t pull the tape too tight, as this will result in an inaccurate, smaller measurement. A comfortable, accurate waist measurement is the first step towards finding underwear that feels great!
Measuring for Underwear Size
Beyond waist measurement, consider the underwear style you prefer. Different styles – briefs, boxer briefs, trunks, boxers – require slightly different considerations for accurate sizing. While waist measurement is primary, hip measurement can be helpful, especially for styles with more coverage.
For briefs and trunks: Focus primarily on the waist measurement. These styles fit closer to the body, so a snug but comfortable fit is key. Ensure the waistband doesn’t dig in or feel restrictive.
For boxer briefs and boxers: Waist measurement remains crucial, but also consider the rise (the distance from the crotch to the waistband). Boxers, in particular, benefit from knowing your inseam (see the dedicated section for details). A proper rise ensures comfortable coverage and prevents unwanted bunching.
When in doubt, measure yourself again! It’s better to double-check than to receive underwear that doesn’t fit. Consult brand-specific size guides (like those available at e-modusvivendi.com) for the most accurate recommendations. Remember, a well-fitting pair of underwear enhances both comfort and confidence.
US Underwear Sizes
US men’s underwear sizes generally correlate with waist measurements, but variations exist between brands. A common starting point is the Small (S) size, typically fitting waists 28-30 inches. Medium (M) usually accommodates waists 32-34 inches, while Large (L) fits 36-38 inches.
Moving up the scale, Extra Large (XL) generally suits waists 40-42 inches, and 2XL fits 44-46 inches. However, these are broad guidelines. Some brands offer sizes like 30, 32, 34, and so on, providing a more precise fit.
It’s crucial to consult specific brand size charts, as sizing can differ significantly. For example, a size 34 waist might be a Medium in one brand but a Small in another. Resources like those found referencing MODUS VIVENDI’s sizing information emphasize this point.
Don’t rely solely on your pant size. Underwear is worn closer to the body, so a slightly smaller size might be necessary for a comfortable, supportive fit. Always prioritize a snug, yet non-restrictive feel. Checking retailer websites, such as beztabaka.by, can provide additional brand-specific details.

European Underwear Sizes
European men’s underwear sizing differs from US standards, utilizing a numerical system often corresponding to waist circumference in centimeters. Sizes typically range from 4 to 10 or beyond, with 4 representing a smaller waist and higher numbers indicating larger sizes.
Generally, size 4 equates to a 76-81cm (30-32 inch) waist, while size 5 fits 81-86cm (32-34 inch). Size 6 corresponds to 86-91cm (34-36 inch), and size 7 fits 91-96cm (36-38 inch). Continuing the scale, size 8 is around 96-101cm (38-40 inch), and size 9 fits 101-106cm (40-42 inch).
It’s important to note that conversions aren’t always exact, and variations exist between brands. Always refer to the specific brand’s size chart for accurate measurements. Some European brands may also include letter sizes (S, M, L, etc.) alongside the numerical system.
When purchasing from European retailers, carefully check the size chart and compare it to your waist measurement in centimeters. Resources referencing sizing guides, like those seen on e-modusvivendi.com, highlight the importance of precise measurements for a comfortable fit. Don’t assume a direct conversion from your US size.
UK Underwear Sizes
UK men’s underwear sizing typically uses waist size in inches, similar to the US system, but with some key differences. Sizes generally range from 28 inches upwards, increasing in increments of 2 inches. However, UK sizing can sometimes run slightly smaller than US equivalents, so careful consideration is needed.
A 30-inch waist in the UK often corresponds to a size Small, while a 32-34 inch waist fits a Medium. A 36-38 inch waist usually requires a Large, and a 40-42 inch waist fits an Extra Large. These are general guidelines, and brand-specific charts should always be consulted.
Unlike the European system, the UK doesn’t commonly use numerical sizing for underwear. Instead, the focus remains on waist measurement in inches, or occasionally, letter sizes (S, M, L, XL). It’s crucial to accurately measure your waist to determine the correct size.
When shopping for UK underwear brands, prioritize checking their individual size guides. Variations exist, and relying solely on standard conversions can lead to an incorrect fit. Resources showcasing size guides, like those found on various retail sites, emphasize the importance of precise measurements for optimal comfort and support.
Australian Underwear Sizes
Australian men’s underwear sizing largely mirrors the UK system, utilizing waist measurements in inches as the primary sizing indicator. This means sizes typically start around 28 inches and increase in two-inch increments. However, like the UK, Australian sizing can sometimes deviate slightly from US standards, necessitating careful attention.
A 30-inch waist generally corresponds to a size Small, while a 32-34 inch waist typically fits a Medium. For a 36-38 inch waist, a Large is usually appropriate, and a 40-42 inch waist often requires an Extra Large. These are broad estimations, and brand-specific size charts are essential for accuracy.
Similar to the UK, numerical sizing isn’t commonly used for Australian men’s underwear. The emphasis remains on waist circumference in inches, or occasionally, standard letter sizes (S, M, L, XL). Accurate waist measurement is paramount for achieving a comfortable and supportive fit.
When purchasing from Australian underwear brands, always prioritize consulting their individual size guides. Variations between brands are common, and relying on generalized conversions can result in an ill-fitting garment. Utilizing available resources and detailed size charts ensures a better shopping experience and optimal comfort.
Underwear Size Charts by Brand
Recognizing that sizing isn’t standardized across the industry is crucial. Each underwear brand often employs unique sizing specifications, making a universal size chart unreliable. Brands like MODUS VIVENDI, frequently referenced in sizing guides, will have their own distinct measurements;
Always prioritize consulting the specific size chart provided by the brand you’re purchasing from. These charts typically detail waist measurements corresponding to their sizes (S, M, L, XL, etc.). Some brands may also include hip measurements or leg opening dimensions for more precise fitting, particularly for styles like boxer briefs.
Websites often feature dedicated size guide pages, like the one found on e-modusvivendi.com, offering detailed tables and instructions. These resources are invaluable for determining your correct size within that brand’s system.
Pay attention to any notes regarding fit. Some brands run “small” or “large,” and this information is usually indicated on their size chart. Consider reading customer reviews for insights into how a particular brand’s sizing tends to run. Accurate measurement and brand-specific charts are your best allies in finding the perfect fit, avoiding returns, and maximizing comfort.
Briefs Sizing
Briefs generally focus on waist measurement for determining the correct size. Unlike looser styles, briefs offer a closer fit, making accurate measurement essential. Typically, a size chart will correlate waist size (in inches or centimeters) to a specific brief size – Small, Medium, Large, and so on.
Measure your natural waistline, not where your pants sit, for the most accurate reading. This is usually about an inch above your belly button. Ensure the measuring tape is snug but not constricting. Compare your measurement to the brand’s specific size chart; remember, sizing varies!
Briefs offer less stretch than other styles, so a closer fit is preferable. If your waist measurement falls between sizes, it’s generally recommended to size up for comfort. However, consider the fabric composition – briefs with more cotton may have less give.
Pay attention to the leg openings. A comfortable brief shouldn’t bind or ride up. Consulting brand-specific guides, like those available on e-modusvivendi.com, is vital for a perfect fit. Prioritize comfort and support when selecting your brief size.
Boxer Briefs Sizing
Boxer briefs blend the support of briefs with the coverage of boxers, requiring a balance between waist and leg fit. Sizing primarily relies on waist measurement, similar to briefs, but leg length can also be a consideration, especially for taller individuals.
Accurately measure your waistline as described previously – just above your belly button, using a snug but comfortable measuring tape. Then, consult the specific brand’s size chart. Sizing can differ significantly between manufacturers, so don’t assume your usual size will always fit.
Boxer briefs generally offer more stretch than traditional briefs due to the added fabric and often incorporate materials like modal or spandex. This allows for a slightly more forgiving fit. If you’re between sizes, you might be able to comfortably choose either size.
Consider the length of the inseam. Some boxer briefs have longer inseams for more coverage, while others are shorter. Resources like those found on e-modusvivendi.com can help you understand a brand’s specific fit. Prioritize comfort and ensure the boxer briefs don’t ride up or feel restrictive.
Trunks Sizing
Trunks offer a modern, square silhouette, falling between briefs and boxer briefs in terms of coverage. Sizing for trunks, like other underwear styles, is heavily dependent on accurate waist measurement. However, the shorter leg length means fit is even more crucial to prevent riding up.
Measure your waist snugly, ensuring the tape measure is level and not too tight. Refer to the brand’s specific size chart – variations are common. Many brands, as seen on sites like e-modusvivendi.com, provide detailed charts linking waist size to specific trunk sizes (S, M, L, etc.).
Trunks typically have a lower rise than boxer briefs, sitting closer to the hip. This means a snug fit is essential to avoid discomfort or unwanted exposure. Pay attention to the waistband’s elasticity and ensure it doesn’t dig in or feel overly constricting.
Fabric composition impacts fit. Trunks with a higher percentage of stretch materials (like spandex or elastane) will generally offer a more flexible and comfortable fit. When in doubt, prioritize a slightly snugger fit over a looser one to minimize movement and maximize support.
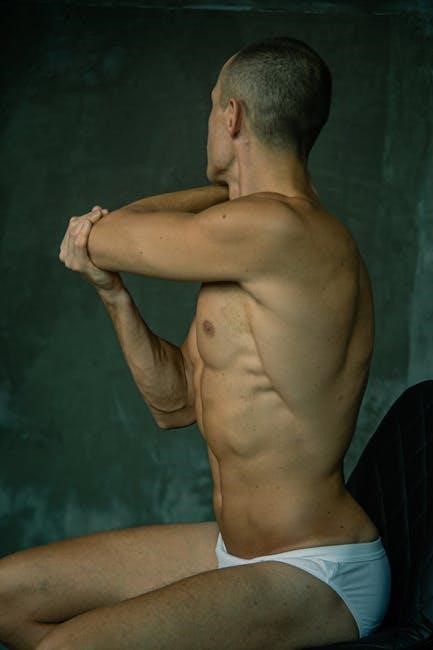
Boxers Sizing
Traditional boxers offer the most relaxed fit of all underwear styles, prioritizing comfort and breathability. Unlike briefs or trunks, boxers are typically sized based on waist measurement, but leg length and rise also play a role in overall fit. A loose fit is characteristic, but avoid excessive bagginess.
Accurate waist measurement is paramount. Measure snugly, and consult the specific brand’s size chart. Boxers often have a more generous cut, so you might find yourself between sizes. If you’re between sizes, consider your preference for looseness – size up for a very relaxed feel, or size down for a slightly more tailored fit.
Pay attention to the rise. Boxers come in low, mid, and high-rise options. Low-rise boxers sit lower on the hips, while high-rise boxers offer more coverage and support. Consider your body type and personal preference when choosing a rise.
Fabric impacts the drape and feel. Lightweight cotton boxers are ideal for warm weather, while flannel boxers provide warmth in colder climates. Remember that fabric shrinkage can occur after washing, so consider this when selecting your size.
Jockstraps Sizing
Jockstraps are uniquely sized, differing significantly from briefs or boxers. They primarily focus on support and are commonly worn during athletic activities. Sizing typically revolves around waist size, but the pouch dimensions are equally crucial for a comfortable and secure fit. Unlike looser styles, a snug fit is essential for optimal performance.
Accurate waist measurement is the starting point. Measure your natural waistline, not where your shorts or pants sit. Refer to the brand’s specific size chart, as variations exist. Many manufacturers also provide sizing based on athletic build – slim, medium, or athletic – to refine your selection.
Pouch size is critical. Ensure the pouch comfortably accommodates and supports your anatomy without being overly constricting. Some jockstraps offer different pouch shapes or sizes; consider your preference for support and freedom of movement.
Consider the strap width and adjustability. Wider straps generally offer more support, while adjustable straps allow for a customized fit. Fabric composition also influences comfort and breathability; moisture-wicking materials are ideal for intense activity.
Thongs and G-Strings Sizing
Mens thongs and g-strings prioritize minimal coverage and a barely-there feel, making sizing a bit different than traditional underwear. These styles generally aren’t about precise waist measurements, but rather focus on a comfortable, secure fit around the glutes and through the front. Sizing often comes in Small, Medium, Large, and Extra Large, but brand variations are significant.
Waist size is a general guideline, but hip size and overall build are more important. A snug fit is essential to prevent riding up or shifting during movement. Many brands offer size charts correlating waist measurements to their specific sizes, but these should be considered approximate.
Stretch is a key factor. Most thongs and g-strings are made from stretchy materials like cotton blends, microfiber, or modal. This elasticity allows for some flexibility in sizing, but avoid choosing a size that feels overly tight or restrictive.
Consider the front pouch design. Some styles have a more contoured pouch, while others are more minimal. Fabric choice impacts comfort; breathable materials are crucial for all-day wear. Prioritize a comfortable fit that doesn’t cause chafing or irritation.

Waist vs. Inseam for Boxers
When selecting boxers, understanding the difference between waist and inseam is crucial for a comfortable fit. Waist size determines how the boxers sit on your hips, preventing them from slipping or feeling too tight. Inseam, however, dictates the length of the leg, impacting overall coverage and style preference.
Waist measurement is paramount. Use a flexible measuring tape to measure around your natural waistline, ensuring it’s snug but not constricting. Most boxer size charts correlate waist measurements to Small, Medium, Large, and XL sizes.
Inseam length varies significantly. Shorter inseams (around 6-7 inches) offer a more modern, shorter leg length, ideal for athletic builds or warmer weather. Longer inseams (8-9 inches) provide more coverage and a classic look.
Consider your height and build. Taller individuals may prefer longer inseams to avoid a “short” appearance. Fabric affects drape; lighter fabrics may require a slightly longer inseam to prevent riding up. Prioritize a length that feels comfortable and suits your personal style.
Common Sizing Mistakes to Avoid

Many men make avoidable errors when purchasing underwear, leading to discomfort and poor fit. One frequent mistake is relying on old sizes – bodies change over time, so regular re-measurement is essential. Don’t assume your size remains constant!
Ignoring size charts is another common pitfall. Each brand, as highlighted by resources like MODUS VIVENDI, can have slightly different sizing standards. Always consult the specific chart for the brand you’re buying.
Failing to consider style variations is also problematic. Boxers fit differently than briefs or trunks. A size that’s perfect in one style might be too tight or loose in another.
Neglecting fabric content can impact fit. Stretchy fabrics offer more flexibility, while less elastic materials require a more precise fit. Don’t size down expecting shrinkage – pre-shrunk fabrics are common now. Finally, avoid guessing – accurate measurement is the key to underwear satisfaction!
How Fabric Affects Fit
The fabric composition of men’s underwear significantly impacts how it fits and feels. Natural fibers like cotton offer breathability and comfort but generally have less stretch. This means a more precise fit is needed to avoid constriction or looseness.
Synthetic fabrics, such as microfiber or modal, provide excellent stretch and recovery. These materials often allow for a slightly more forgiving fit, accommodating movement and body changes. They also tend to be moisture-wicking, enhancing comfort.
Blends of fabrics combine the benefits of both. For example, a cotton-elastane blend offers breathability with added stretch. The percentage of elastane (Spandex) is crucial – higher percentages mean greater elasticity.
Consider the fabric weight. Lightweight fabrics are ideal for warm weather and active lifestyles, while heavier fabrics provide more support and warmth. Always check the care label to understand how the fabric will behave after washing, as some fabrics shrink or lose elasticity.
Size Variations Between Styles
Men’s underwear sizing isn’t uniform across all styles. A size ‘M’ in briefs may fit differently than a size ‘M’ in boxer briefs or trunks. This is due to variations in cut, fabric, and intended support levels.
Briefs, offering maximum support, often run slightly smaller, requiring some to size up. Boxer briefs, with more fabric and a longer leg length, generally have a more relaxed fit. Trunks, a mid-length option, fall somewhere in between.
Boxers, known for their loose fit, are the most forgiving in terms of sizing, but waist measurement is critical. Jockstraps and thongs require precise sizing due to their minimal coverage and focus on support.
Brand-specific sizing further complicates matters. Always consult the individual brand’s size chart, as they may differ significantly from standard measurements. Prioritize waist size as the primary factor, then consider leg length and desired level of support when choosing between styles.
Understanding Rise (Low, Mid, High)
Rise refers to where the underwear waistband sits on your waist. It significantly impacts comfort and how the underwear feels when worn. Understanding the different rises – low, mid, and high – is crucial for finding the best fit.
Low-rise underwear sits below the natural waistline, often on the hips. This style is popular for a more modern look and is best suited for those with a leaner build. Mid-rise underwear, the most common, sits at or slightly below the natural waist, offering a balance of comfort and support.
High-rise underwear sits above the natural waistline, providing maximum coverage and support. This style is often preferred for its secure feel and can be beneficial for those with a larger waist.
Consider your body type and personal preference when choosing a rise. Fabric and style also play a role; thicker fabrics may require a higher rise for comfort. Always check the product description to determine the rise before purchasing.
Checking the Care Label for Sizing Information
Don’t overlook the care label! While primarily for washing instructions, some brands subtly include sizing details or warnings about fit on these labels. This is especially true for brands prioritizing quality and customer satisfaction. It’s an often-missed resource that can prevent sizing errors.
Look for specific notes about “runs small” or “true to size.” These indicators, though brief, offer valuable insight beyond standard size charts. Some labels might even mention how the fabric behaves after washing – crucial as shrinkage can affect fit.
Pay attention to fabric composition listed on the label. Blends with elastane or spandex will generally have more stretch and potentially offer a more forgiving fit. Conversely, 100% cotton may shrink slightly after washing, impacting the size.
Consider this information alongside the brand’s official size guide. The care label provides a nuanced perspective, complementing the broader sizing recommendations. It’s a small detail that can make a significant difference in your comfort and satisfaction.
Online Size Finders and Tools
Leverage the power of technology! Many online retailers and brands now offer interactive size finder tools to help you determine your ideal underwear size. These tools typically ask for your waist measurement and sometimes weight, height, or preferred style. They then provide a personalized size recommendation.
These tools aren’t foolproof, but they’re a great starting point, especially when shopping with a brand you’re unfamiliar with. Always cross-reference the tool’s suggestion with the brand’s detailed size chart. Remember, algorithms are based on averages, and individual body shapes vary.
Look for tools that allow you to input your size in different systems (US, EU, UK, Australian) for greater accuracy. Some even allow you to specify your preferred style – briefs, boxers, or boxer briefs – as sizing can differ between styles.
Utilize retailer websites like beztabaka.by, which often link to brand-specific size guides. MODUS VIVENDI also likely offers such tools on their site. Combining these resources increases your chances of finding the perfect fit online.
What to Do If Your Size is Between Sizes
Finding yourself between sizes is common! When your waist measurement falls between two sizes on a chart, it’s time to consider a few factors. Generally, it’s better to size up rather than down. A slightly looser fit is usually more comfortable, especially for all-day wear.
Consider the fabric content. Underwear made with cotton or linen tends to shrink slightly after washing, so sizing up is particularly advisable. Synthetic fabrics like microfiber retain their shape better.
Think about your body type and preferred fit. If you have a more athletic build, you might prefer a snugger fit and could consider staying with the smaller size. If you prefer a relaxed feel, size up.
Read reviews! Other customers’ experiences can offer valuable insights. MODUS VIVENDI and retailers like beztabaka.by often have customer reviews that mention sizing. Don’t hesitate to order both sizes if possible, utilizing generous return policies to determine the best fit.
Return Policies and Exchanges
Understanding return policies is vital when purchasing underwear online, as accurate sizing can be challenging. Most retailers, including those like MODUS VIVENDI and beztabaka.by, offer return or exchange options, but the specifics vary significantly.
Check the retailer’s website for detailed information regarding their policy. Pay close attention to the timeframe for returns (typically 30-60 days) and whether they offer free return shipping. Some brands may require items to be unworn, unwashed, and with original tags attached.
Hygiene concerns often lead to restrictions on underwear returns. Some companies may offer exchanges only, or store credit instead of a full refund. Always review the fine print before making a purchase.
Keep your proof of purchase and packaging materials. This will streamline the return or exchange process. Contact customer service if you have any questions or encounter issues. A clear understanding of the policy ensures a hassle-free experience if the initial size isn’t quite right.
Resources for Further Sizing Assistance
Finding the perfect fit sometimes requires extra help! Beyond brand-specific size charts, several resources can provide additional guidance when navigating men’s underwear sizing. Retailer websites, such as MODUS VIVENDI and beztabaka.by, often feature detailed FAQs or sizing guides.
Online communities and forums dedicated to men’s fashion can offer valuable insights from other shoppers. These platforms allow you to ask questions and share experiences regarding specific brands and styles.
Many brands offer virtual sizing assistance, including live chat with fit experts or personalized recommendations based on your measurements. Utilize these tools when available.
Consider professional tailoring for a truly customized fit, especially for more formal underwear styles. YouTube tutorials can also demonstrate proper measuring techniques. Don’t hesitate to leverage all available resources to ensure comfort and confidence. Remember, a well-fitting garment enhances both style and well-being.