GE Steam Washer Dryer Combo Manual: An Overview
This manual details the GE combo washer/dryer, offering instructions for installation, operation, and maintenance, including steam features and WiFi connectivity.
Understanding Your GE Combo Unit
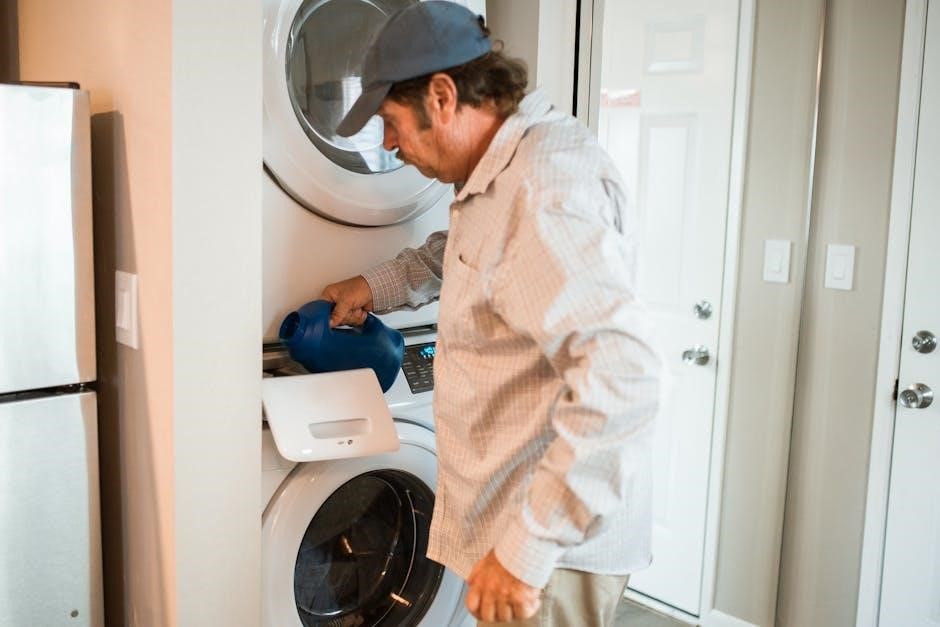
Your GE combination unit streamlines laundry, integrating washing and drying into a single appliance. This innovative design saves space and offers convenience, eliminating the need to transfer wet clothes. Familiarize yourself with the unit’s capabilities, including steam wash features for enhanced cleaning and sanitization.
The GFQ14 model, for example, offers both washing and condenser drying functionalities. Understanding the interplay between these cycles is crucial for optimal performance. Proper leveling, as detailed in the installation instructions, ensures stability and minimizes vibration. The WiFi Connect feature allows remote control and monitoring, enhancing usability. Regular maintenance, like cleaning the dryer filter, is vital for longevity and efficiency.
Model Numbers and Identification
Identifying your GE combo unit’s model number is essential for accessing specific support and documentation. The model number, typically found on a label inside the door or on the rear panel, provides crucial information about your appliance’s features and specifications. For instance, the GFQ14 is a common model, representing a steam washer and condenser dryer combination.

This number is vital when ordering replacement parts, such as a washer pump, or consulting the service manual. Variations within models may exist, denoted by additional characters following the base number. Accurate identification ensures you receive the correct instructions and assistance. Referencing the model number when contacting GE customer support streamlines the process and guarantees tailored solutions for your specific unit.
Installation Instructions
Proper installation involves unpacking, leveling the unit, and securely connecting water and drain lines, ensuring stability and optimal performance of your GE combo.
Unpacking and Initial Setup
Carefully unpack your GE combo washer and dryer, inspecting for any shipping damage before proceeding. Remove all packing materials, including tape, cardboard, and protective films, from both the interior and exterior of the appliance. Retain the installation instructions and this manual for future reference.
Before initial use, verify all components are present. Locate and set aside the included accessories, such as the water inlet hoses and drain hose. Ensure the shipping bolts, used to stabilize the drum during transport, have been removed. These are crucial to remove to prevent damage during operation. Refer to the diagrams in this manual for their precise location. Finally, wipe down the interior drum with a clean, damp cloth to remove any dust or debris accumulated during shipping.
Leveling the Unit
Proper leveling is essential for optimal performance and to minimize vibration and noise during operation of your GE combo unit. Use a spirit level to check the appliance’s stability on the floor. Adjust the leveling legs, located at each corner of the unit, by rotating them clockwise or counterclockwise.
Extend or retract the legs until the appliance is perfectly level in both directions – side-to-side and front-to-back. Ensure the unit is stable and doesn’t wobble. Tighten the lock nuts against the appliance’s base to secure the legs in position after leveling. Re-check the level after tightening. A properly leveled washer will contribute to quieter operation and prevent potential issues with the washer and dryer cycles.
Water and Drain Connections
Connect the hot and cold water supply hoses to the designated inlets on the back of the GE combo unit. Ensure the connections are tight to prevent leaks. Attach the drain hose securely to a standpipe or laundry tub, following local plumbing codes. The drain hose should be positioned at the correct height to facilitate proper drainage.
Verify that all connections are secure before operating the appliance. Inspect the hoses for any kinks or damage. Improper water or drain connections can lead to water damage or inefficient operation. Always shut off the water supply before disconnecting or servicing the water hoses.
Operating Instructions
Follow the control panel guide for cycle selection, steam wash features, and drying options to efficiently operate your GE combo unit.
Control Panel Explained
The control panel is your interface for operating the GE combo unit. It features a digital display showcasing cycle progress and remaining time. Cycle selection is managed through a dial or buttons, allowing you to choose from various wash and dry programs. Dedicated buttons activate steam wash features for enhanced cleaning and sanitization.
Temperature settings are adjustable, catering to different fabric types. Drying options include sensor dry, timed dry, and delicate settings. The panel also incorporates options for delay start, extra rinse, and other customized preferences. Error codes displayed indicate potential issues requiring attention. WiFi Connect features are accessed through dedicated icons, enabling remote control and monitoring via a smartphone app. Familiarize yourself with each button and setting for optimal performance.
Cycle Selection Guide
The GE combo unit offers a diverse range of cycles to suit various laundry needs. Normal cycle is ideal for everyday cottons and linens. Delicates cycle provides gentle cleaning for fragile items like lingerie and silk. Heavy Duty cycle tackles heavily soiled work clothes and durable fabrics.
Steam Wash cycles enhance cleaning power and sanitize, perfect for bedding and baby clothes. Quick Wash offers a faster cleaning option for lightly soiled items. Bulky Items accommodates larger loads like comforters. Sanitize cycle eliminates bacteria. Drying cycles include sensor dry, timed dry, and delicate settings. Consult the full manual for detailed descriptions and recommended load sizes for each cycle to ensure optimal results and fabric care.
Steam Wash Features
GE’s Steam Wash technology elevates laundry care by utilizing the power of steam. Steam cycles penetrate fabrics more effectively, loosening dirt and stains for a deeper clean. This is particularly beneficial for heavily soiled items and bedding, offering enhanced sanitation.
Steam Refresh gently revitalizes clothes, reducing wrinkles and odors without a full wash. Sanitize with Steam eliminates 99.9% of common household bacteria. These features are ideal for allergy sufferers and families with young children. Always refer to the garment care label before using steam cycles. Proper usage ensures optimal cleaning and prevents damage to delicate fabrics, maximizing the benefits of this advanced technology.
Drying Options and Settings
GE combo units offer a variety of drying options to cater to different fabric types and needs. Delicate and Normal cycles provide gentle or standard heat for everyday items. Bulky/Bedding accommodates larger loads like comforters, while Timed Dry allows customized drying durations.
Sensor Dry automatically detects moisture levels, preventing over-drying and saving energy. Wrinkle Shield option periodically tumbles clothes after the cycle ends, minimizing creases. Always check garment care labels before selecting a drying cycle. Proper settings ensure optimal drying performance and protect your clothes from damage. Explore the manual for detailed explanations of each setting.
Maintenance and Troubleshooting
Regular cleaning of the drum and filter, alongside addressing error codes, ensures optimal performance and longevity of your GE combo washer and dryer.
Cleaning the Washer Drum
Maintaining a clean washer drum is crucial for preventing odors and ensuring optimal washing performance with your GE combo unit. Regularly, approximately once a month or after every 30 wash cycles, perform a drum cleaning cycle. Utilize a washer cleaner specifically designed for front-load machines, following the product’s instructions carefully.
Alternatively, a natural cleaning solution of baking soda and white vinegar can be employed. Add two cups of white vinegar to the detergent dispenser and one-quarter cup of baking soda directly into the drum. Run a hot water cycle on the longest setting. After the cycle completes, leave the door ajar to allow for thorough drying and ventilation, preventing mildew growth. Inspect the rubber door seal for any debris or mold, cleaning it with a damp cloth and mild detergent.
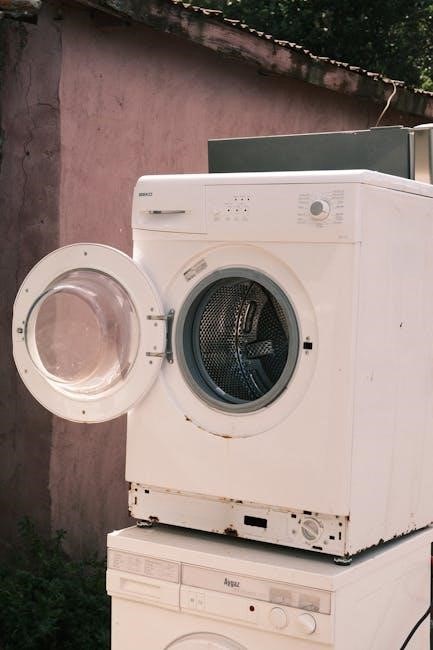
Cleaning the Dryer Filter
Regularly cleaning the dryer filter is paramount for efficient drying and preventing fire hazards with your GE combo unit. The filter is typically located inside the dryer door or within the lint trap housing. After each drying cycle, remove the filter and thoroughly clean it, removing all lint and debris. A clogged filter restricts airflow, increasing drying times and potentially causing overheating.
To clean, simply pull or lift the filter out and use your fingers or a vacuum cleaner attachment to remove the accumulated lint. Occasionally, wash the filter with warm water and a mild detergent to remove any residue buildup. Ensure the filter is completely dry before reinstalling it. Inspect the filter housing for any lint accumulation and clean it as needed. A clean filter ensures optimal dryer performance and safety.
Addressing Common Error Codes
Encountering error codes on your GE combo unit indicates a potential issue requiring attention. Common codes often relate to water supply, drainage, or internal component malfunctions. Consult the full error code list within your manual for specific definitions. For example, a “WD” code might signal a water drainage problem, requiring a check of the drain hose for kinks or blockages.
Before contacting service, attempt simple troubleshooting steps like restarting the unit or checking water connections. If an error persists, record the code and consult GE’s online support resources or contact customer service. Ignoring error codes can lead to more significant damage. Always disconnect the unit from power before attempting any internal inspections or repairs. Prioritize safety and professional assistance when needed.
Component Breakdown
This section details key parts like the washer pump, conical spring, and leg adjustments, aiding in understanding the GE combo unit’s internal structure.
Washer Pump Inspection
Regular inspection of the washer pump is crucial for optimal performance of your GE combo unit. The pump, often a twin-speed, three-phase model, facilitates water drainage during wash cycles. Begin by disconnecting power to the appliance before any inspection. Accessing the pump typically involves removing a lower access panel.
Visually examine the pump for any obstructions, such as lint, small objects, or debris, that may impede its function. Carefully check the pump’s impeller for damage or cracks. A damaged impeller will significantly reduce pumping efficiency. Ensure the pump’s electrical connections are secure and free from corrosion. If the pump appears faulty, consider professional repair or replacement to avoid water damage and maintain the unit’s functionality.
Conical Spring and Washer Details
Proper assembly of the conical spring, washer, and associated nuts is vital for secure component fastening within your GE combo unit. These components work in conjunction to provide cushioning and maintain tension in critical areas, potentially within the pump or motor assembly. During maintenance, carefully note the order and orientation of these parts – conical spring (7), washer (8), and thrust washer (9) – before disassembly.
Ensure the spring is correctly seated and the washers are not damaged or worn. Tighten the nuts (10) to the manufacturer’s specified torque to prevent loosening during operation. Incorrect assembly can lead to vibrations, noise, and eventual component failure. Refer to detailed diagrams within the service manual for precise placement and tightening guidelines.
Unit Leg Adjustment
Achieving stability is paramount for optimal GE combo washer/dryer performance. Proper unit leg adjustment minimizes vibration and noise during operation. Begin by verifying the floor is level; use a spirit level placed atop the appliance. If uneven, rotate the adjustable feet – typically located at each corner – to raise or lower that side until level is achieved.
Ensure all legs firmly contact the floor. A slightly wobbly unit indicates insufficient contact or improper adjustment. Tighten the locking nuts on each leg after leveling to prevent accidental movement. Regularly check leg stability, especially after moving the appliance. A stable unit protects flooring and ensures safe, efficient washing and drying cycles.

Safety Information
Prioritize safety by following all precautions outlined in this manual, especially regarding WiFi connection and proper washer/dryer usage for safe operation.
Important Safety Precautions
Before operating your GE combo unit, carefully review these crucial safety guidelines. Always ensure the appliance is properly grounded to prevent electrical shock. Never attempt to repair the unit yourself; contact qualified service personnel for assistance.
Keep children and pets away from the appliance during operation. Do not overload the washer or dryer, as this can cause damage and pose a safety hazard. Avoid washing or drying flammable materials.
Disconnect the power supply before cleaning or performing maintenance. Regularly inspect the power cord for damage and replace if necessary. Be cautious when handling hot water and steam to prevent burns. Follow all installation instructions carefully to ensure a stable and secure setup. Improper leveling can lead to instability and potential injury.
WiFi Connect Features
Your GE appliance boasts integrated WiFi Connect capabilities, enhancing convenience and control. Download the GE Appliances app to remotely monitor and manage your washer/dryer combo. Receive real-time notifications regarding cycle status, completion, and potential maintenance alerts directly on your smartphone.
Utilize the app to start or pause cycles remotely, adjust settings, and download new wash programs. Voice control compatibility with Google Assistant and Amazon Alexa allows for hands-free operation.
Troubleshooting assistance is readily available through the app, providing helpful tips and guidance. Ensure a stable WiFi connection for optimal performance. Regularly update the app to benefit from the latest features and security enhancements. Explore personalized settings for a tailored laundry experience.
Technical Specifications

GE combo units offer varied capacities and dimensions, alongside detailed energy consumption data, ensuring efficient operation and optimal performance for your laundry needs.
Capacity and Dimensions
Understanding the capacity and dimensions of your GE steam washer and dryer combo is crucial for proper installation and maximizing its utility. These units are designed to offer a substantial wash and dry capacity within a compact footprint, ideal for apartments or smaller laundry spaces.
Typical GE combo models boast a wash capacity ranging from 2.5 to 4.0 cubic feet, and a drying capacity slightly lower, around 3.2 cubic feet. Precise dimensions vary by model, but generally fall within a height of 38-40 inches, a width of 24 inches, and a depth of 29-32 inches.
Always consult your specific model’s manual for exact dimensions and capacity details to ensure it fits comfortably within your designated laundry area and meets your household’s laundry volume requirements. Proper space allocation is key for optimal performance.
Energy Consumption Data
GE steam washer dryer combos are engineered with energy efficiency in mind, though actual consumption varies by model and usage patterns. Understanding this data helps optimize operation and minimize utility costs. The EnergyGuide label, affixed to each unit, provides standardized estimates for annual energy use.
Typically, these combos consume between 300-500 kWh per year for washing and 500-800 kWh per year for drying, depending on cycle selection and frequency. Steam cycles generally require more energy than conventional wash cycles.
To reduce consumption, utilize eco-friendly cycles, wash full loads, and regularly clean the dryer filter. Refer to your manual for specific energy-saving tips tailored to your GE model. Monitoring usage and adopting efficient practices contribute to both cost savings and environmental responsibility.